ShopDreamUp AI ArtDreamUp
Deviation Actions
I have been working with a team of artist to produce a line of graphic illustrations. This collection will be a line of clothing printed for Fatbol Clothing.

It is an honor to work with a great group of talented artists and as the art director of this project it is my job to make sure the art gets from their canvas' to the garment with out any hangups. of course there is many variables in the printing process from conscious sourcing, color schemes, delivery, release dates, company politics, marketing, quality....Etc. I will have to deal with all of these things but my main quest is to get good art from good artists onto good clothing for a market that wants to wear quality pieces of art.
My main goal in this is to share the simple operating procedure so all artists looking to do commercial reproductions of their graphic works can step up and make their art print ready. If you do not do it, then someone else will and that means that the quality of your work will likely be mangled and the output will not match the original quality of the piece. Unfortunately this has happened to me on many occasions, not fun. I hope to pass on the knowledge and you don't have to be bummed when you get back your print and the intention that you put into your piece of work is not reproduced correctly. Plus it makes my life a lot easier as the art director when my team of artists has control of their work environment as much as possible. Lets all do good commercial art and sell it to the folks who appreciate it greatly and can print it with the least amount of negative translation.
Here we go!!!!! (I am listening to White Zombie, and I am on a roll!!!!)
There is many steps in the journey of the art that you are wearing on your clothing.
.Doing the quality art, traditional or digital.
.Making it digital by scanning or photographing high resolution.
.Separating the colors to be printed cleanly.
.Trapping the layers to greatly reduce visual chatter if misprinted.
.Presenting the file in layers with clean registration marks on each layer.
.Making the image the correct size to print.
.Choosing and labeling the color way of the inks and garment color.
.Double checking the printers file parameters, and sending it.
If all these things, and maybe a few more, are done, then you will get a good piece back, and if you don't, you can take it up with the printer.
I am not going to go through the whole story. My point with this is to show artist how to make their pieces print ready so there is no question that the printer SHOULD do an impeccable job printing.
In this tutorial I am going to go over the printing process of multiple layers, successful trapping, and use of registration marks.
SO......
You have done a great drawing, rad, NOW WHAT?
In a previous post I talked about the drawing process of this piece so I will not get back into those details, here is the post if you want to do your homework:
draweverywhere.blogspot.com/20…
You can't just hand it off to someone and hope it gets printed correctly. It is not that easy, unless your process is fully sponsored and there are print monkeys at the ready.
This is the second silkscreen I ever did, and it is a great example of all the ways I failed in printing but learned SO MANY lessons.
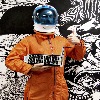
 Your drawing is quality, you stand behind the concept and the technique. The above is a drawing I did in pencil on 18x24 in bond paper. I scanned it and had to do quite a bit of cleaning in photoshop to get it to a level of line quality that will print beautifully.
It could be finished at this level of drawing, or painted in a different medium to a rendered or graphic finish. My goal is to make this line drawing into a full color silk screened print. Basically that means this image will be printed on top of many other printed layers so it ends up with a range of colors and textures like a painting.
Each layer needs to be created from this drawing. I will speak for my own style which is pretty tight and inside the lines. Each layer will have to be lined up on the finished print of it will look wonky in the end and you will look like a rookie. If you have off registration printing, like Morning Breath's work, you have to design for it. All your elements have to be tight in order to break the rules. Silk screen has many variables of certain failure, like so many things in life you have to master them to be able to bend them.
From the drawing I decide on a the amount of layers of color that will visually tell my story. Silk screen is by nature a visually flat medium, there is not an color blending happening in the basic process so have a plan.
Notice the registration marks, they are in every layer with will be made into individual separations and printed on top of each other in sequence to the top. If any of the layers gets messed up in the process, then you either have to be really clever in fixing the print or you have lost a piece of art. When your printing shirts or posters and you screw on up it is a bummer. One less piece you can sell to your collectors.


This is what a poorly registered piece will print like. Even a fraction of an inch will be noticed. Sometimes that visual chatter adds character to the print, if you do it right, or your lucky.
Trapping the layers means covering the gaps of the previous layer with the with of the layer above it. If you cut a square out of a piece of paper and then try to fit it back in the same spot you cut it from you will see slight holes to the surface below on the edge of the square. if you move the cut piece slightly in the hole you made the gaps between the edges grow exponentially. Lining it up right is the registration.
Next, cut a square that is slightly bigger that the hole you previously cut. Now lay it over the whole. Now all of the small space of the surface below can be covered. This is the physics of Trapping.
Now shift the larger piece slightly, notice it covers the hole even if there is a variance in placement. This is the physics of Registration.
When each of the layers has target Registration marks, then on the first pass the printer can line up the new marks to the previous marks and the layers will line up perfectly. If the layer takes into account for trapping, then the layers can have slight variance and the final print will still look acceptable to a point. The holes that you see in the image above will be covered, you would not be able to see down to the orange under color if I had trapped the image correctly.

Below is my finished print "The End of an Era" 18x24 printed on tan paper. I was just starting out in my graduate career in printing class and had a lot to learn. The series started out with 60 in the edition but I wrecked a good 20 in the process. Some turned out great and others got burned, buffed, or used as wrapping paper. It could have easily been printed on t shirts or any other media. The cool thing about printing is that even if you wreck a bunch there is still a whole covey of success. They can all be sold to different collectors to enjoy the same image and you can keep one! Awesome, I still have some for sale if you want a piece of this history.


It is an honor to work with a great group of talented artists and as the art director of this project it is my job to make sure the art gets from their canvas' to the garment with out any hangups. of course there is many variables in the printing process from conscious sourcing, color schemes, delivery, release dates, company politics, marketing, quality....Etc. I will have to deal with all of these things but my main quest is to get good art from good artists onto good clothing for a market that wants to wear quality pieces of art.
My main goal in this is to share the simple operating procedure so all artists looking to do commercial reproductions of their graphic works can step up and make their art print ready. If you do not do it, then someone else will and that means that the quality of your work will likely be mangled and the output will not match the original quality of the piece. Unfortunately this has happened to me on many occasions, not fun. I hope to pass on the knowledge and you don't have to be bummed when you get back your print and the intention that you put into your piece of work is not reproduced correctly. Plus it makes my life a lot easier as the art director when my team of artists has control of their work environment as much as possible. Lets all do good commercial art and sell it to the folks who appreciate it greatly and can print it with the least amount of negative translation.
Here we go!!!!! (I am listening to White Zombie, and I am on a roll!!!!)
There is many steps in the journey of the art that you are wearing on your clothing.
.Doing the quality art, traditional or digital.
.Making it digital by scanning or photographing high resolution.
.Separating the colors to be printed cleanly.
.Trapping the layers to greatly reduce visual chatter if misprinted.
.Presenting the file in layers with clean registration marks on each layer.
.Making the image the correct size to print.
.Choosing and labeling the color way of the inks and garment color.
.Double checking the printers file parameters, and sending it.
If all these things, and maybe a few more, are done, then you will get a good piece back, and if you don't, you can take it up with the printer.
I am not going to go through the whole story. My point with this is to show artist how to make their pieces print ready so there is no question that the printer SHOULD do an impeccable job printing.
In this tutorial I am going to go over the printing process of multiple layers, successful trapping, and use of registration marks.
SO......
You have done a great drawing, rad, NOW WHAT?
In a previous post I talked about the drawing process of this piece so I will not get back into those details, here is the post if you want to do your homework:
draweverywhere.blogspot.com/20…
You can't just hand it off to someone and hope it gets printed correctly. It is not that easy, unless your process is fully sponsored and there are print monkeys at the ready.
This is the second silkscreen I ever did, and it is a great example of all the ways I failed in printing but learned SO MANY lessons.
It could be finished at this level of drawing, or painted in a different medium to a rendered or graphic finish. My goal is to make this line drawing into a full color silk screened print. Basically that means this image will be printed on top of many other printed layers so it ends up with a range of colors and textures like a painting.
Each layer needs to be created from this drawing. I will speak for my own style which is pretty tight and inside the lines. Each layer will have to be lined up on the finished print of it will look wonky in the end and you will look like a rookie. If you have off registration printing, like Morning Breath's work, you have to design for it. All your elements have to be tight in order to break the rules. Silk screen has many variables of certain failure, like so many things in life you have to master them to be able to bend them.
From the drawing I decide on a the amount of layers of color that will visually tell my story. Silk screen is by nature a visually flat medium, there is not an color blending happening in the basic process so have a plan.
Notice the registration marks, they are in every layer with will be made into individual separations and printed on top of each other in sequence to the top. If any of the layers gets messed up in the process, then you either have to be really clever in fixing the print or you have lost a piece of art. When your printing shirts or posters and you screw on up it is a bummer. One less piece you can sell to your collectors.
Each color is stacked on the previous and the last line work gets all the credit for making your piece look tight and finished. If you are off on any one, or even many of the passes of color the piece will look like a rookie in a classroom did it. ( That was me on this piece!)
This is what a poorly registered piece will print like. Even a fraction of an inch will be noticed. Sometimes that visual chatter adds character to the print, if you do it right, or your lucky.
Trapping the layers means covering the gaps of the previous layer with the with of the layer above it. If you cut a square out of a piece of paper and then try to fit it back in the same spot you cut it from you will see slight holes to the surface below on the edge of the square. if you move the cut piece slightly in the hole you made the gaps between the edges grow exponentially. Lining it up right is the registration.
Next, cut a square that is slightly bigger that the hole you previously cut. Now lay it over the whole. Now all of the small space of the surface below can be covered. This is the physics of Trapping.
Now shift the larger piece slightly, notice it covers the hole even if there is a variance in placement. This is the physics of Registration.
When each of the layers has target Registration marks, then on the first pass the printer can line up the new marks to the previous marks and the layers will line up perfectly. If the layer takes into account for trapping, then the layers can have slight variance and the final print will still look acceptable to a point. The holes that you see in the image above will be covered, you would not be able to see down to the orange under color if I had trapped the image correctly.
Below is my finished print "The End of an Era" 18x24 printed on tan paper. I was just starting out in my graduate career in printing class and had a lot to learn. The series started out with 60 in the edition but I wrecked a good 20 in the process. Some turned out great and others got burned, buffed, or used as wrapping paper. It could have easily been printed on t shirts or any other media. The cool thing about printing is that even if you wreck a bunch there is still a whole covey of success. They can all be sold to different collectors to enjoy the same image and you can keep one! Awesome, I still have some for sale if you want a piece of this history.
Notice in closing, that there is some registration and trapping mistakes on this piece, but it turned out pretty nice. I have sold many of the edition and I was educated greatly in the process.
Hopefully this was a fun and educational read. Now go and practice!
Hopefully this was a fun and educational read. Now go and practice!
Painting huge pieces for the aerospace lab.
It is an honor and a pleasure to share an on going series of paintings that I have been rapidly painting as the Art Director and Illustrator at Planet Labs in SF.
Each of these pieces is 48 x 48 inches. They are painted on primed wood panels because I love the texture and rigidity of wood. I have been on art sprints alongside the aerospace engineers producing each painting in 3 work days. So 24 hours per piece, I love to work on multiple pieces at a time and will share the process of bouncing between pieces in a future post.
Our company is an earth imaging satellite company. We use our data to show the large organic changes occurring in the
This weekend I painted a large mural in Chinatown!
I love painting large and it is always an honor to be asked by a wonderful organization to paint at their space and represent their community visually. This week I was asked to paint a piece in Oakland Chinatown at Lincoln Square. An amazing community center the has droves of smiling people enjoying the giant ship like playgrounds, the expansive b-ball courts, and sword fighting in the lawn bowling court, to name a few. The ages ranges from 1 to 100+ and all the folks were super stoked to see this painting in process. My good friend Christopher Mackessy, ( who took most of the photos for the deviantART Gear Shop,) is also a painter, As well a
A touching note, and my advice on moving forward.
AmirBeniz said the following:
I am a High school senior at the moment, and I'm choosing colleges to further develop my inspiration for art.
Right now I'm in a rut to decide which school to go to and how I am to pay for it.
I've been drawing everyday since I was a child but my art hasn't gotten to the professional level, ya know like yours.
What do you think I should do?
Re: Did you go to school for this?
from $draweverywhere
to ~AmirBeniz
Hello there!
I greatly appreciate note and I can say that I know exactly how you are feeling about the next steps from high school into art land. On your page it says "I am an upcoming artist whom gener
Rocking Pieces in dAmuro!
As a successful artist you have to be resilient and be able to adapt to new media. dA muro is a great archway between traditional mark-making and digital responsiveness. You pick up a new medium, it takes a bit to be able to speak your own style through the new marks. Not unlike a watercolor paintbrush or a chalk pastel for the first time, it takes some getting used to for sure. It is pretty straight forward and with practice it is as awesome as any other medium you are stoked on.
Here are some other pieces I have made with dA muro.
Featured in Groups

© 2012 - 2024 draweverywhere
Comments0
Join the community to add your comment. Already a deviant? Log In